


In this tutorial, learn how to use the Add
Photo Tool to turn a simple portrait into an
#AnimalOverlay
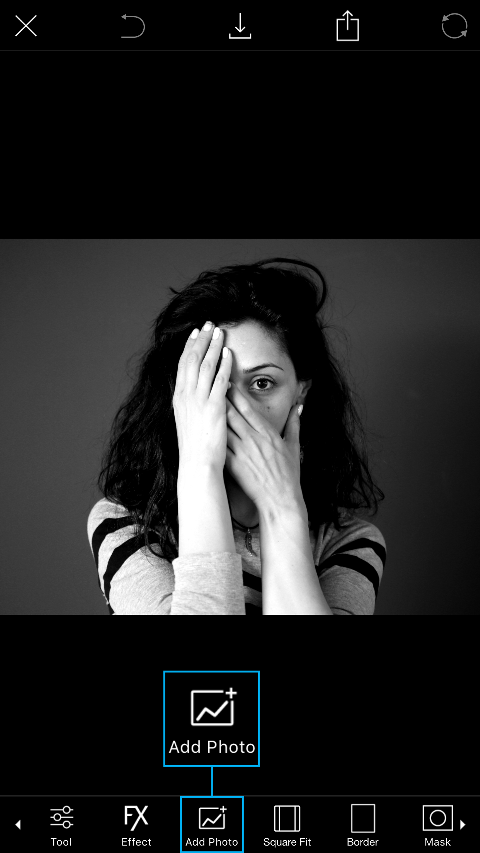
Step 1
Open a portrait in the photo editor. Use o
of your own shots or find one in the app b
searching for #FreeToEdit and #Portrait.
Tap on the Add Photo icon and select a
photo of an animal.
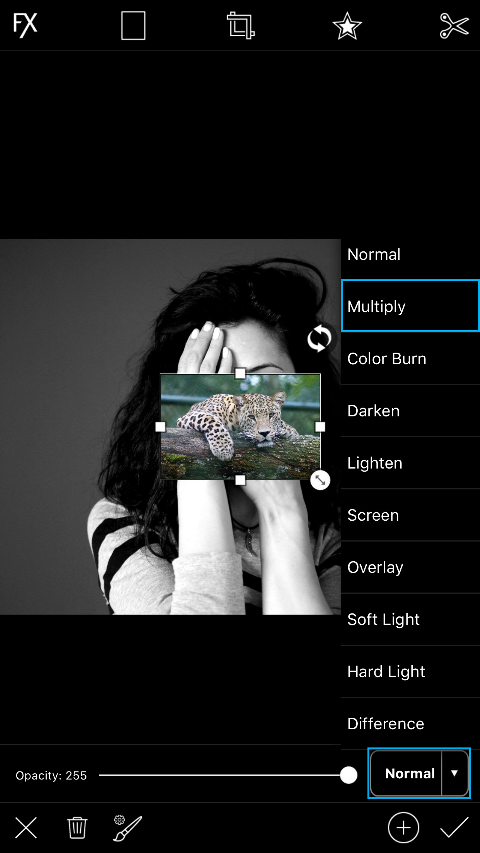
Step 2
Tap on “Normal” and select the “Multiply”
blending mode.
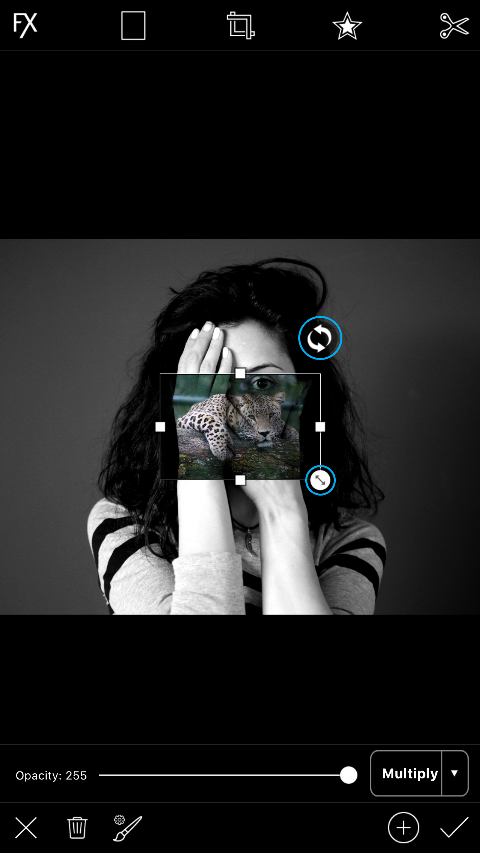
Step 3
Use the arrows icon in the bottom right
corner to enlarge the added image. Use t
circular arrows icon to rotate it. Drag the
image to place it so that the face lines up
with your portrait.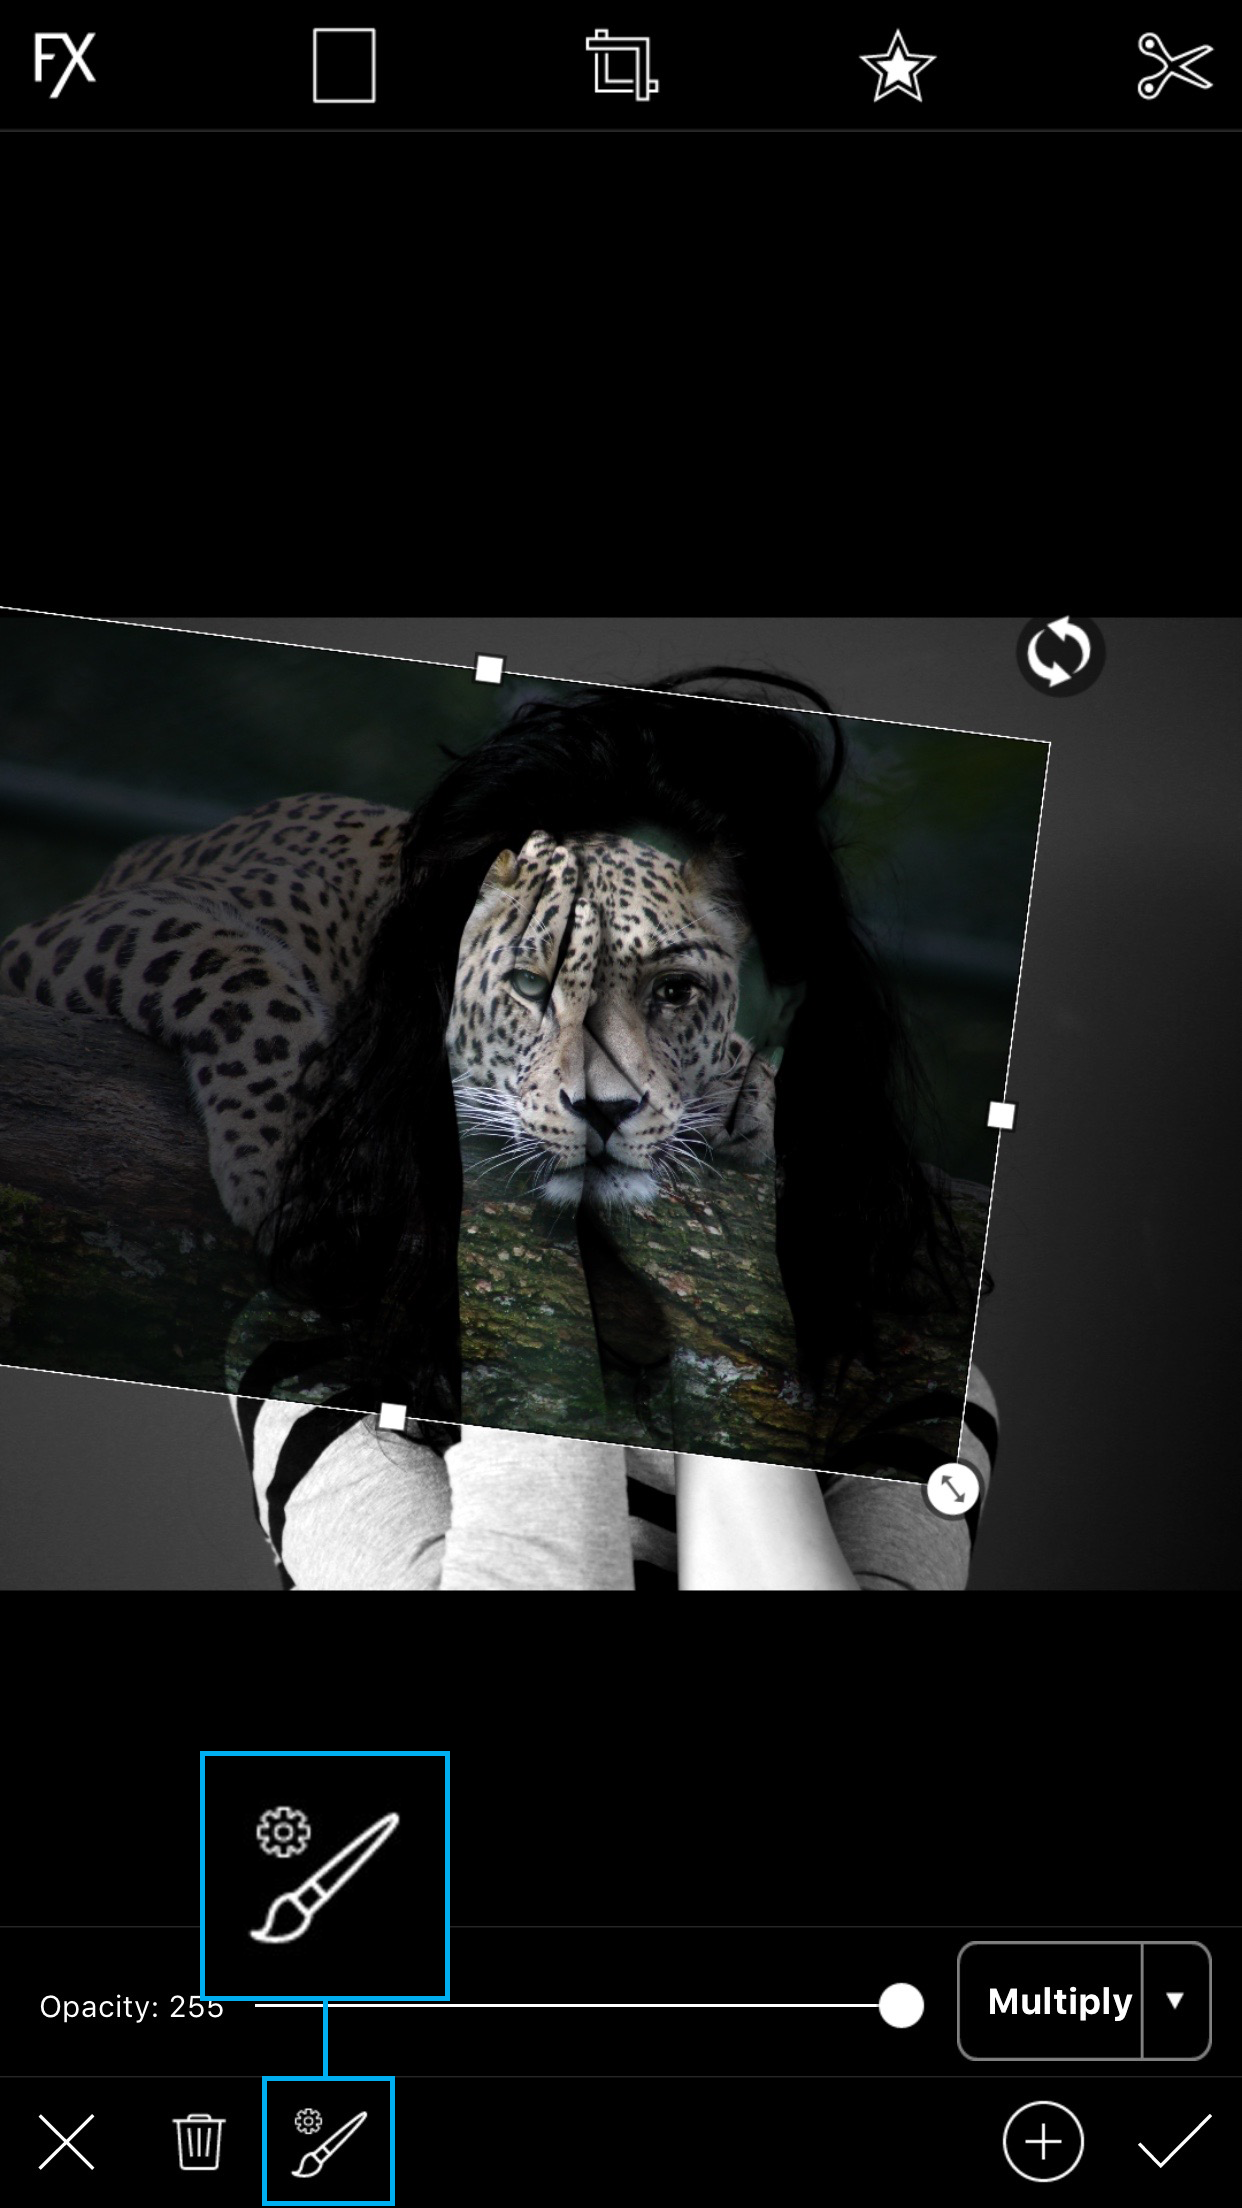

Step 4
Tap on the paintbrush icon.

Step 5
Use your finger or stylus to erase the edg
of the added image. If you erase too mu
tap on the paintbrush icon to switch to th
Paintbrush Tool and paint the added ima
back on. When you’re done, tap on the ch
mark to confirm.

Now Save Ur Image ;)
You Are Done !
Dont forget to share us !!
Photo Tool to turn a simple portrait into an
#AnimalOverlay
Step 1
Open a portrait in the photo editor. Use o
of your own shots or find one in the app b
searching for #FreeToEdit and #Portrait.
Tap on the Add Photo icon and select a
photo of an animal.
Step 2
Tap on “Normal” and select the “Multiply”
blending mode.
Step 3
Use the arrows icon in the bottom right
corner to enlarge the added image. Use t
circular arrows icon to rotate it. Drag the
image to place it so that the face lines up
with your portrait.
Step 4
Tap on the paintbrush icon.
Step 5
Use your finger or stylus to erase the edg
of the added image. If you erase too mu
tap on the paintbrush icon to switch to th
Paintbrush Tool and paint the added ima
back on. When you’re done, tap on the ch
mark to confirm.
Now Save Ur Image ;)
You Are Done !
Dont forget to share us !!
No comments:
Write comments